Many organizations have shared administrative accounts that are used to manage users, infrastructure, operating systems, etc. These may be Local Admin accounts, Privileged User Accounts or Domain Admin accounts. These accounts are important targets for attacks as they allow escalation. In the 'pass-the-hash' attack, the attacker doesn't even need to crack the password, just send AD the proper hash. Even more risky, these accounts are often shared across multiple administrators. Companies will share these passwords via a spreadsheet or a password manager. Various Privileged Access Management solutions offer password vaults. However, we feel using one-time passwords is the optimal way to minimize these risks.
This document will show you how to configure this capability on your WiKID server.
Active Directory Setup
There's very little to do in AD, actually. All we recommend is that you create a Domain Admin. This domain admin needs a static password and will reset the passwords for all the other accounts.
WiKID Server setup
Enable the Active Directory Protocol
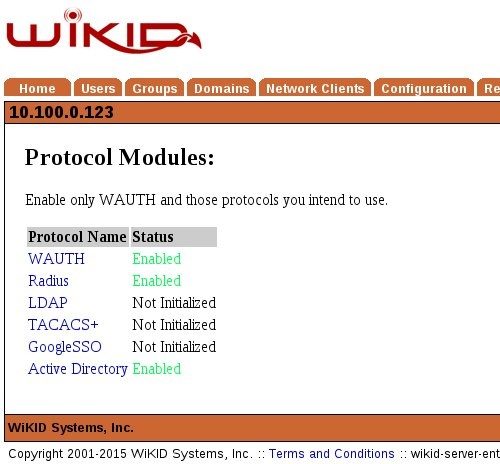
On the WiKIDAdmin UI, Click on the Configuration tab and Enable Protocols. Active Directory should listed as "Not Initialized". Click on Active Directory and then Enable. After you do, your Enable Protocol page should look like this:

Now, we need to create a Domain for Active Directory two-factor authentication. Note that this domain can only do two-factor authentication for Active Directory. It cannot also do VPNs or other services. It is similar to TACACS+ in this regard. Also, you may want to use an Internal IP for the domain identifier (WiKID tokens communicate with the server and use the zero-padded IP address of the server to find them) so that the administrators would have to be on the internal network. If you are using this for a remote service, use an external IP address.
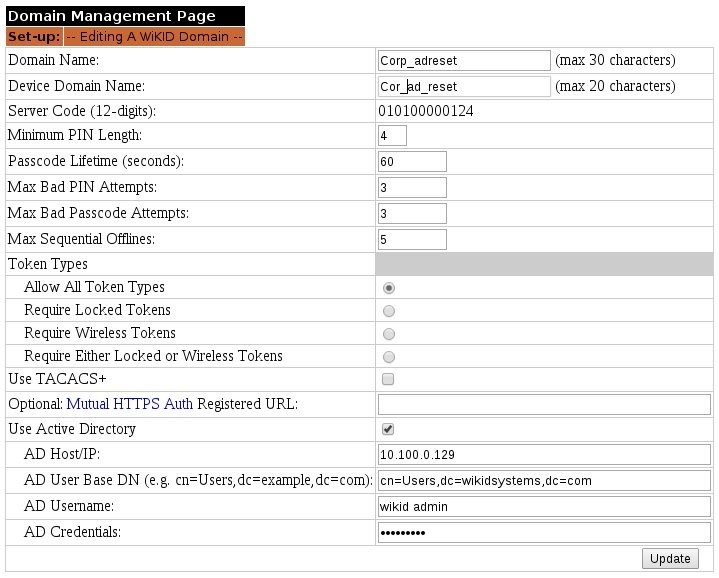
On the Domain Tab, select Create a New Domain. Give the domain a name (the first box is internal to WiKID, the second shows up on the token). Enter the Server Code/Domain identifier. This is the zero-padded IP of the server. This example uses the internal address, but if your users are external, they will need an external IP address (though it can be NAT'd). Set the domain security parameters as you see fit. And the click on the Use Active Directory box.
Enter the IP address of your AD server and the User Base DN. Then enter the domain admin account and credentials created in AD.
 +
+
Note that if your AD domain is say external.example.com then your DN would be cn=Users,dc=external,dc=example,dc=com. Click Save/Update.
