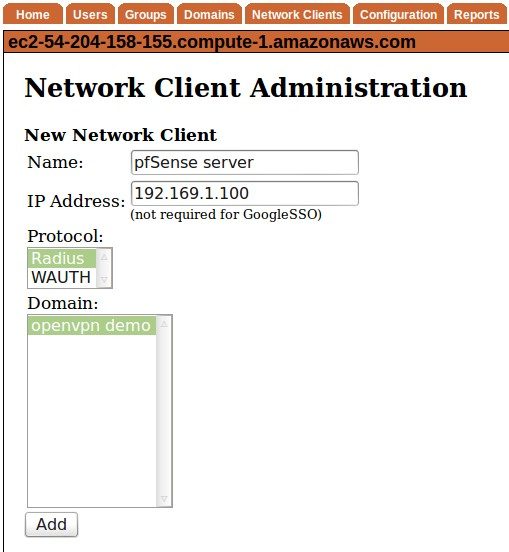
As per usual, we'll be using RADIUS. We assume you have set up the WiKID server. (If you haven't please download a free trial of our two-factor authentication server.) Log into your WiKIDAdmin interface and click on the Network Clients tab. Click on Create A New Network Client and enter a name for the network client, such pfSense server, enter it's IP address , select Radius as the network authentication protocol and choose the WiKID Domain.

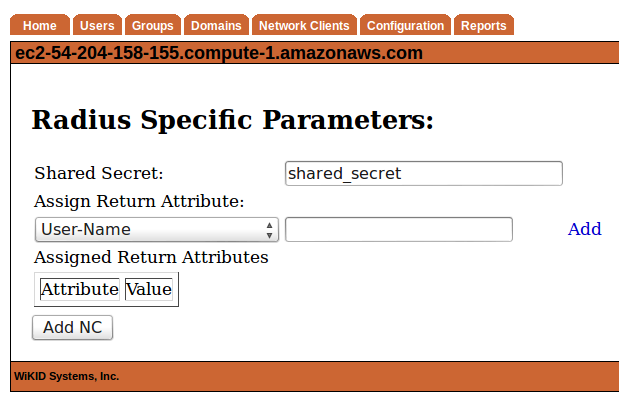
Click the Add button and on the next page, enter the shared secret. Leave the Return Attributes empty, unless you know what you are doing. Click Add NC.

That's it for WiKID - you just need to restart the WiKID process to load the new Radius configuration in the server.
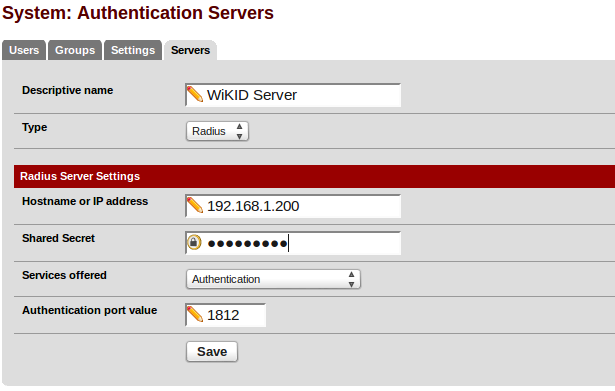
On the pfSense server, login to the web interface. Select System, User Manager and click on the Servers tab. Click on the Add Server button. Give it a Descriptive Name such as "WiKID Server", type Radius. Enter the IP address of the WiKID server and the Shared Secret you created on the WiKID server above.

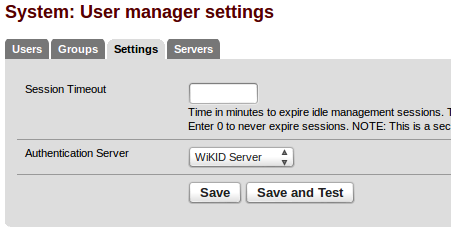
Hit the Save button. Next, click on the Settings tab and select the WiKID Server as the Authentication Server.

That's it. You should now be able to login to your pfSense services using Radius. Note that we have set up the pfSense to talk directly to the WiKID Strong Authentication server. While that might work for you, most organizations should configure radius to do authorization against their directory, e.g. AD or LDAP. Please see this document on how to add two-factor authentication with AD performing authorization and this document on Freeradius with OpenLDAP.
Don't have your WiKID Strong Authentication server set up yet? Download it today!
