Configuring NPS for Two-factor authentication
NB: Please see our latest tutorial on how to add two-factor authentication to NPS 2012.
Integrating NPS in the strong authentication process is part of a bigger pircture. See the complete architecture in our eGuide!
In this tutorial, we will be adding NPS into the authentication process for authorization. The users will be logging into your application or VPN with their username and WiKID one-time passcode. NPS will perform authorization based on the username alone - the AD password is not required. Keep in mind that in the RADIUS world, a client is asking for an authentication and a server is authenticating. So, your VPN or application is a RADIUS client to NPS and NPS is a RADIUS server to the VPN/application. In turn, WiKID is a RADIUS server to NPS and NPS is a Network Client to WiKID.
Note: If you need native Windows/AD two-factor authentication for users or more likely, admins and service accounts, please see this document.
Add the NPS Role
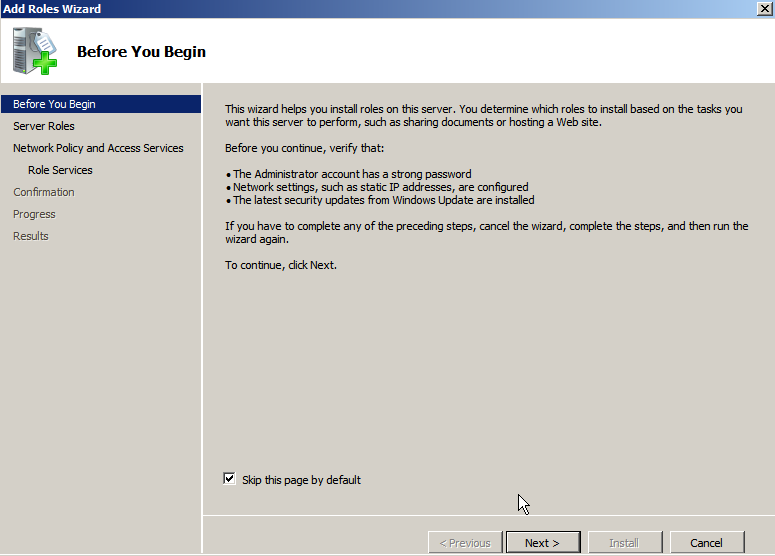
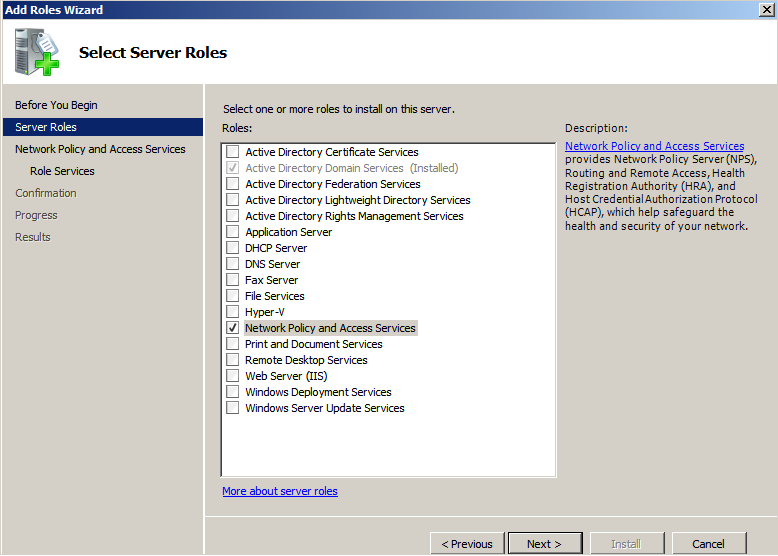
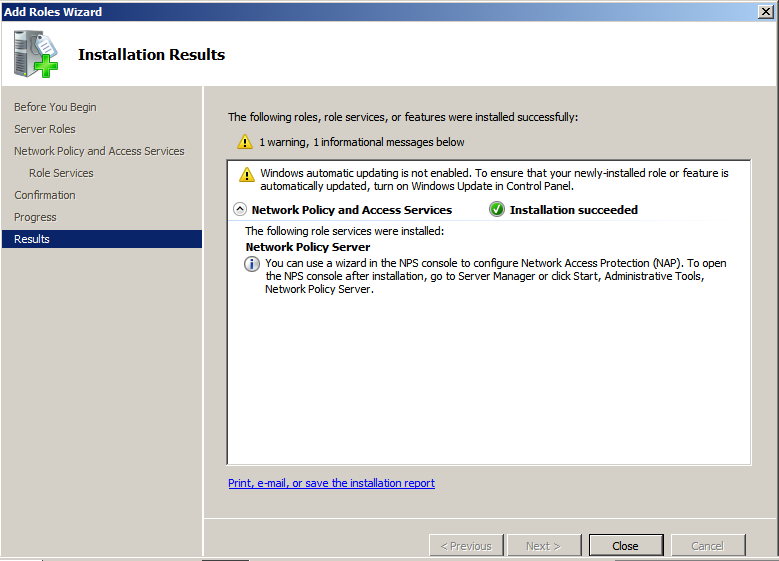
Start but Adding the NPS role to your Windows 2008 server:
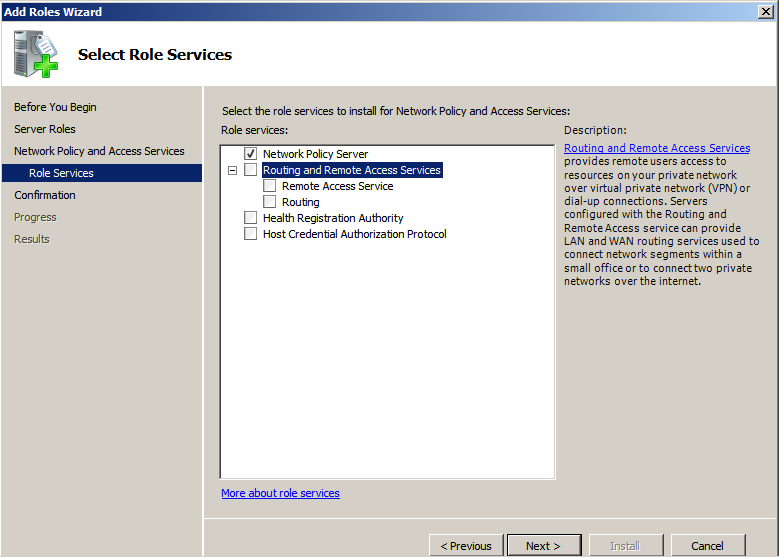
The only service we need is Network Policy Server
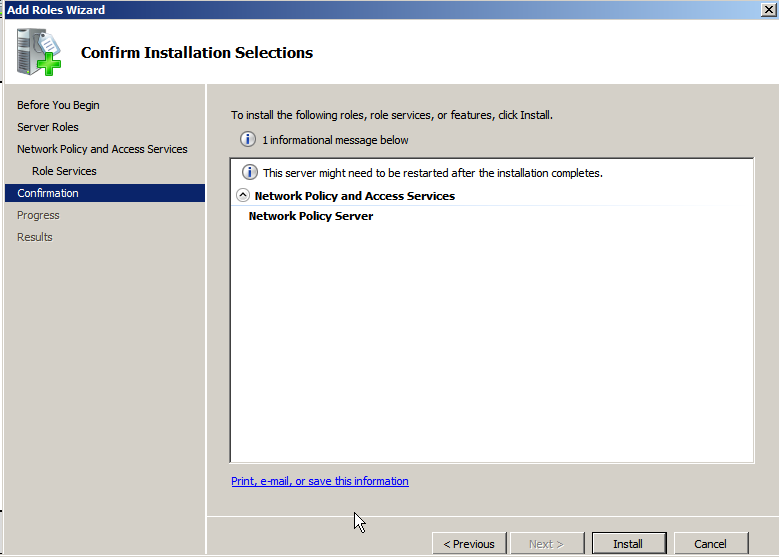
You will need to restart the server.
Adding your VPN/remote service as a Radius Client
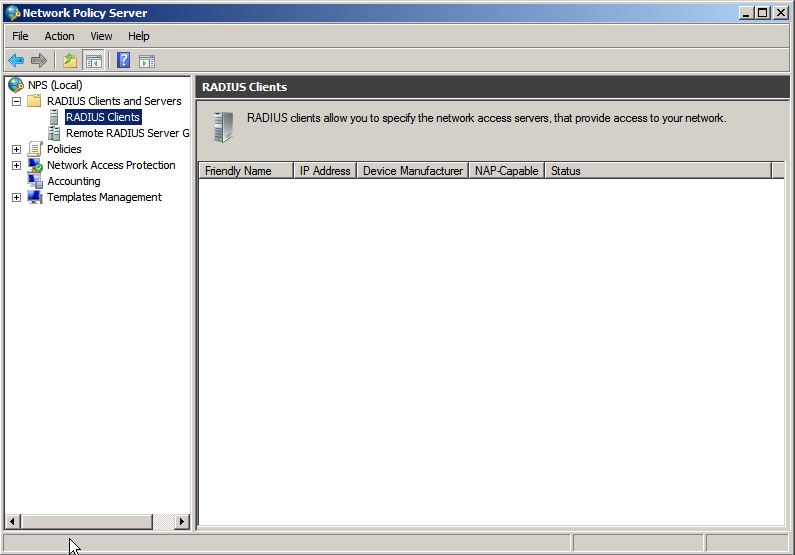
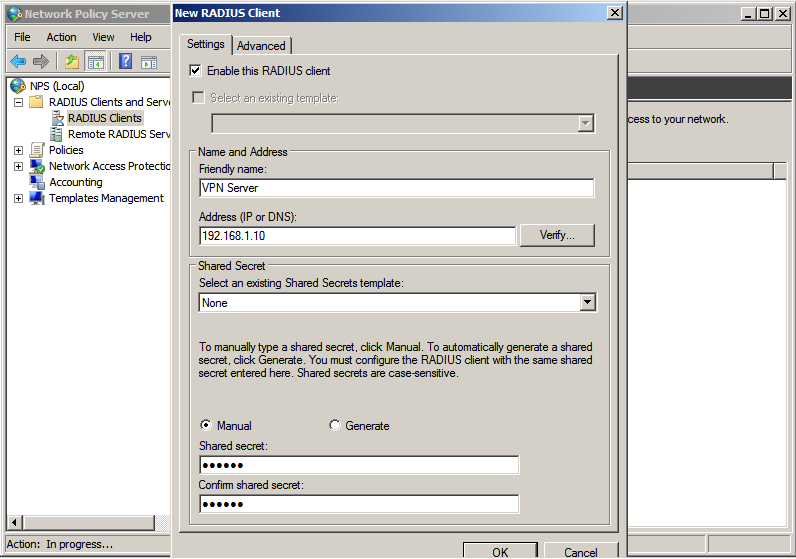
Once the server has rebooted, start the Network Policy Server admin tool, right-click on RADIUS Clients and select New.
Give your RADIUS client a friendly name such as "Enterprise VPN" or "Partner Extranet" and enter the IP address. Enter the same shared secret here as you did in your RADIUS client. This shared secret is used to encode the traffic between your VPN/remote access service/application and NPS.
Adding WiKID to NPS as a RADIUS Server
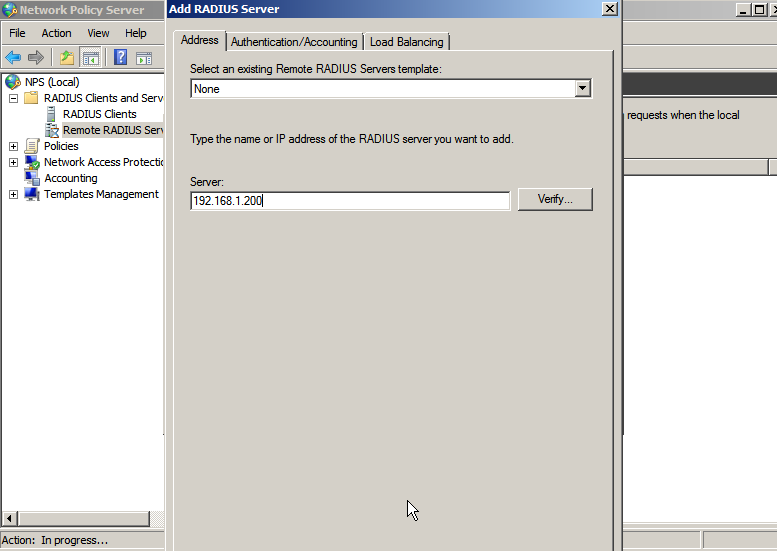
Next, right-click on Remote RADIUS Servers and select New. Under Server, enter the IP address of the WiKID Strong Authentication Server.
Click on the Authentication/Accounting tab. Enter the same Shared Secret here as you enter in the Network Client tab on the WiKID Server. This shared secret is used to encode the traffic between NPS and the WiKID Strong Authentication server. Check the box for "`Request must contain the message authenticator attribute".
Adding a Network Policy
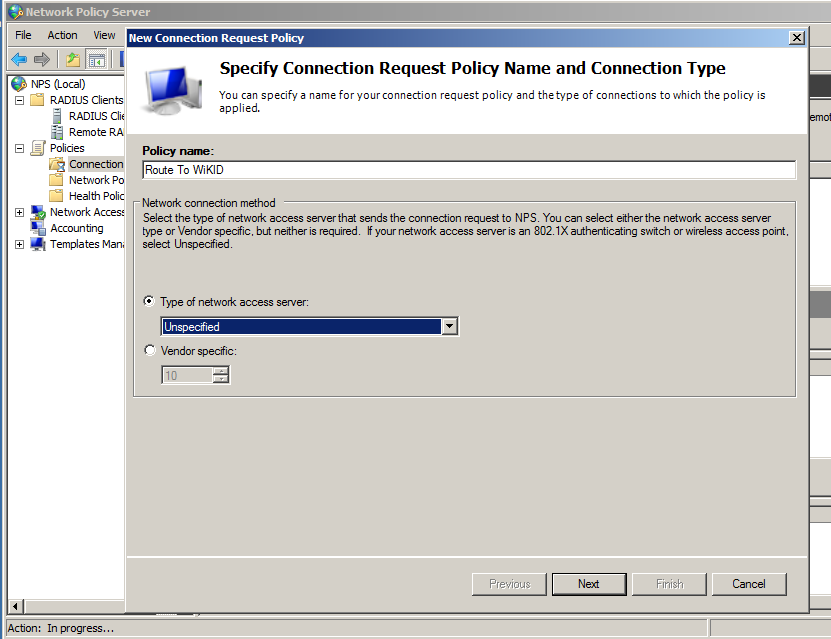
Right-click on Connection Policy and select New. Give the Policy and Name and click Next
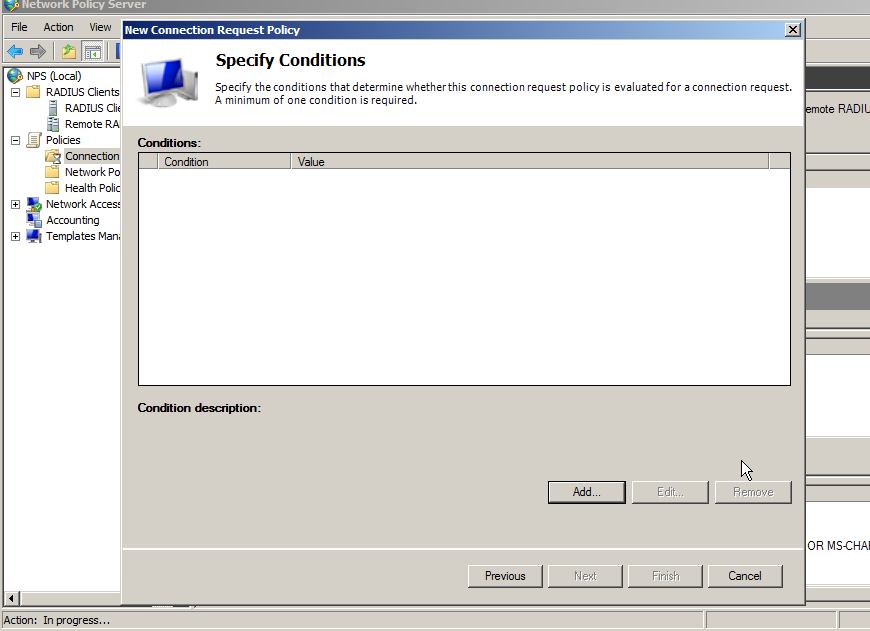
Click Add to add a Condition.
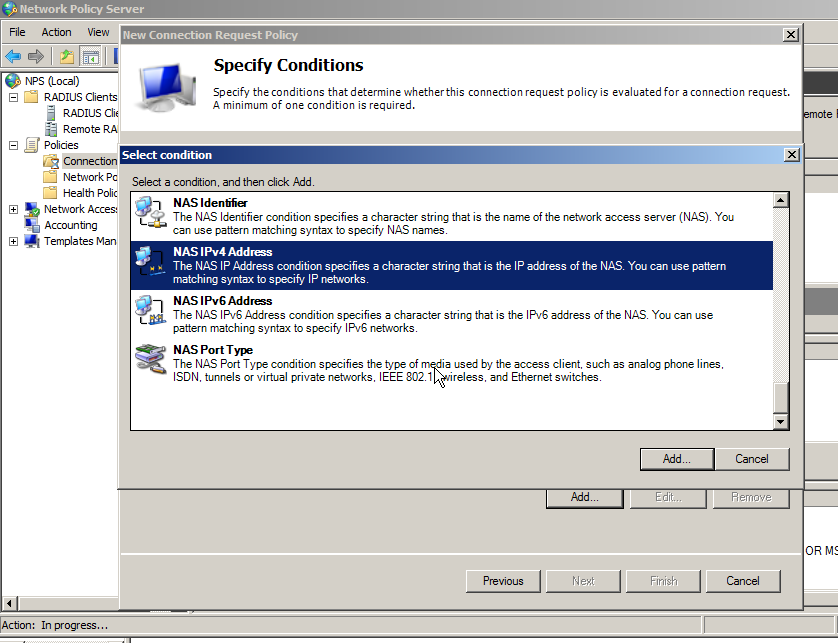
You need to add a condition or the policy will never be used. If you want all the users of this RADIUS client to use two-factor authentication, then you can specify that the NASIPv4Address be used. Alternatively, you can state that connections at any time require two-factor authentication. Please see the Microsoft documentation for more options and details.
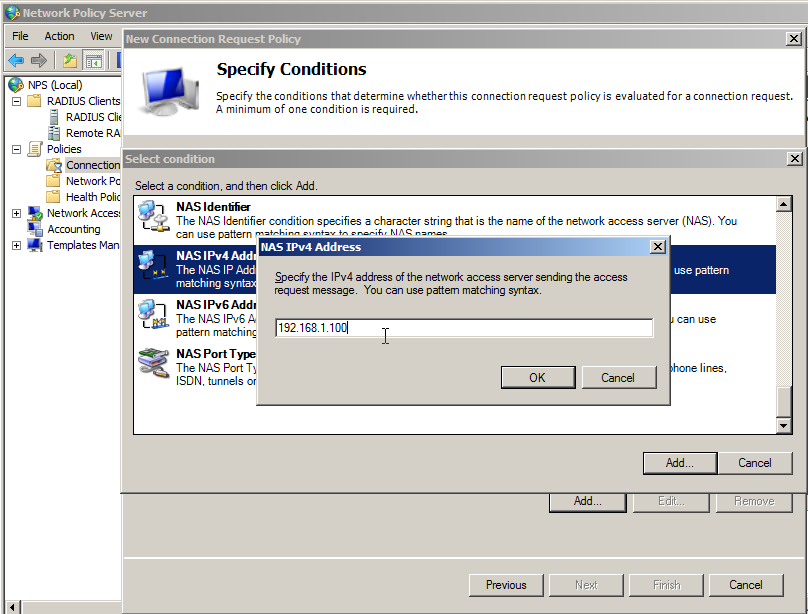
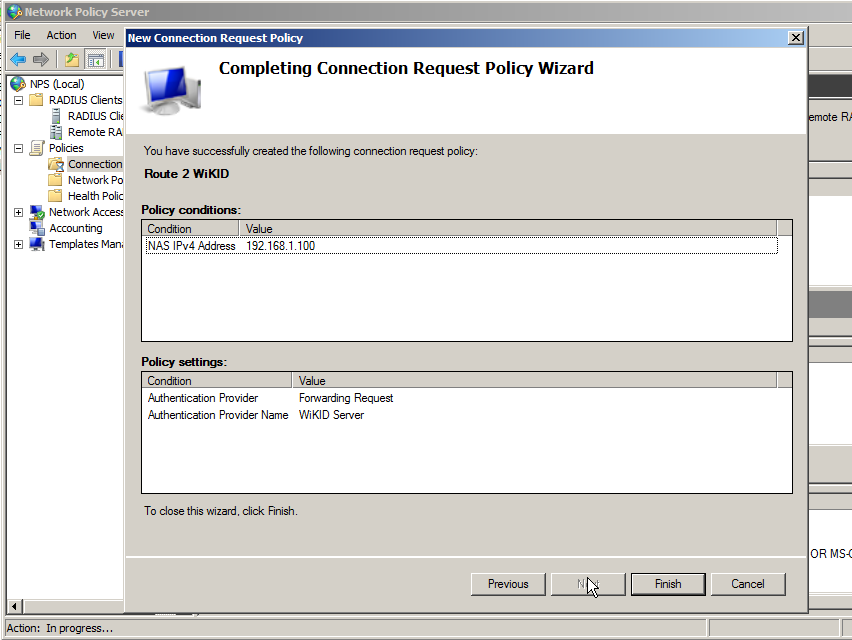
Click on NASIPv4Address and enter the IP Address of the RADIUS client (your VPN/remote services).
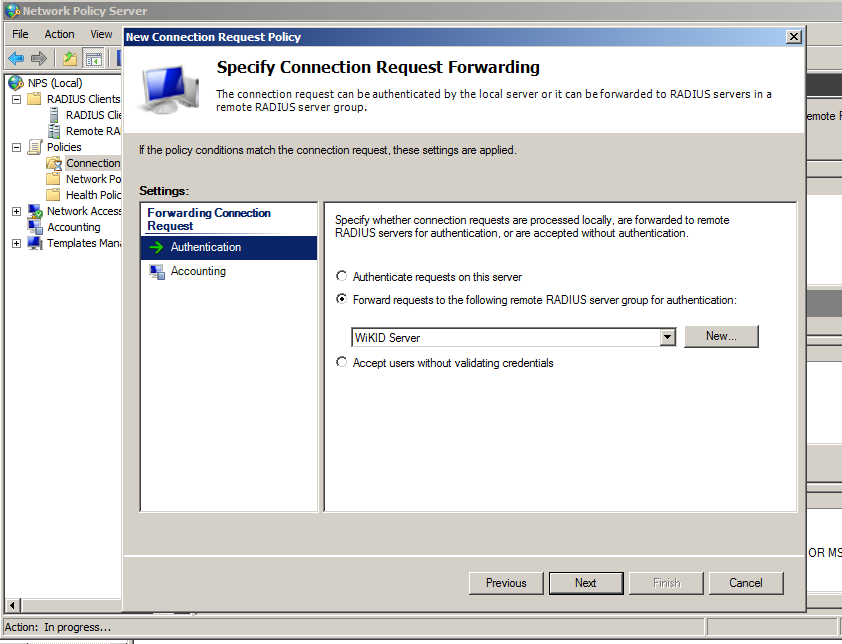
Click Next and select Authentication. Choose the radio button for "Forward requests to the following remote RADIUS server group for authentication and select the WiKID server.
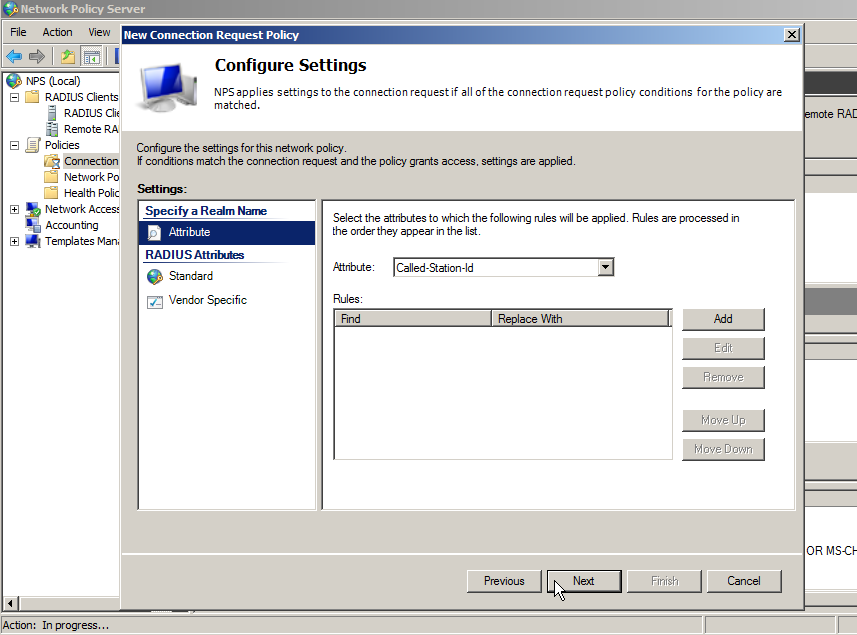
Click Next. Do not specify any RADIUS Return Attributes, unless you know what you are doing.
Click Finish.
Adding Dial-in permissions to the user
If you tested this configuration now, you would see the following errors in the Windows Event log:
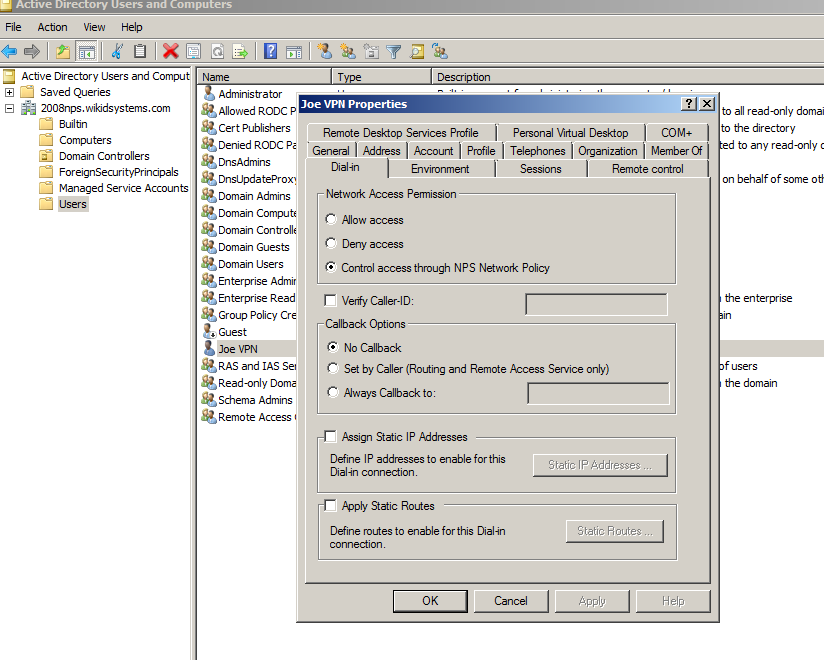
The Network Access Permission setting in the dial-in properties of the user account in Active Directory is set to Deny access to the user. To change the Network Access Permission setting to either Allow access or Control access through NPS Network Policy, obtain the properties of the user account in Active Directory Users and Computers, click the Dial-in tab, and change Network Access Permission.
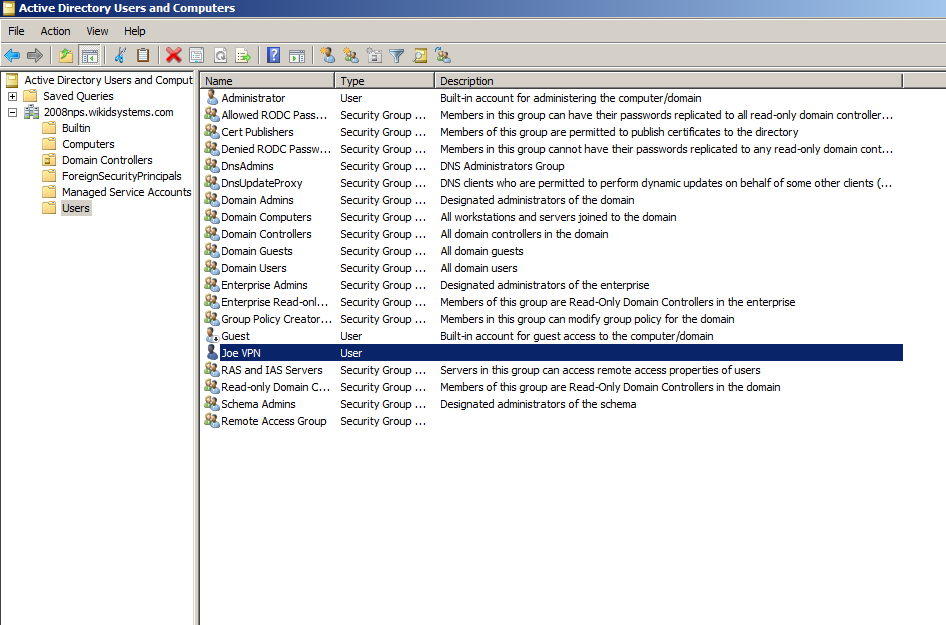
Start the Active Directory Users and Computers admin tool and click on Users.
Right click on the user and click on the Dial-in tab. Under Network Access Permission, choose Control Access through NPS Network Policy.
Notes
That should do it. You will also need to open port 1812 UDP for the radius traffic on your Windows server firewall. If you want to learn more about configuring NPS please see Microsoft's documentation on the NPS Authorization process.
Download the WiKID Strong Authentication Enterprise Edition.
Update:
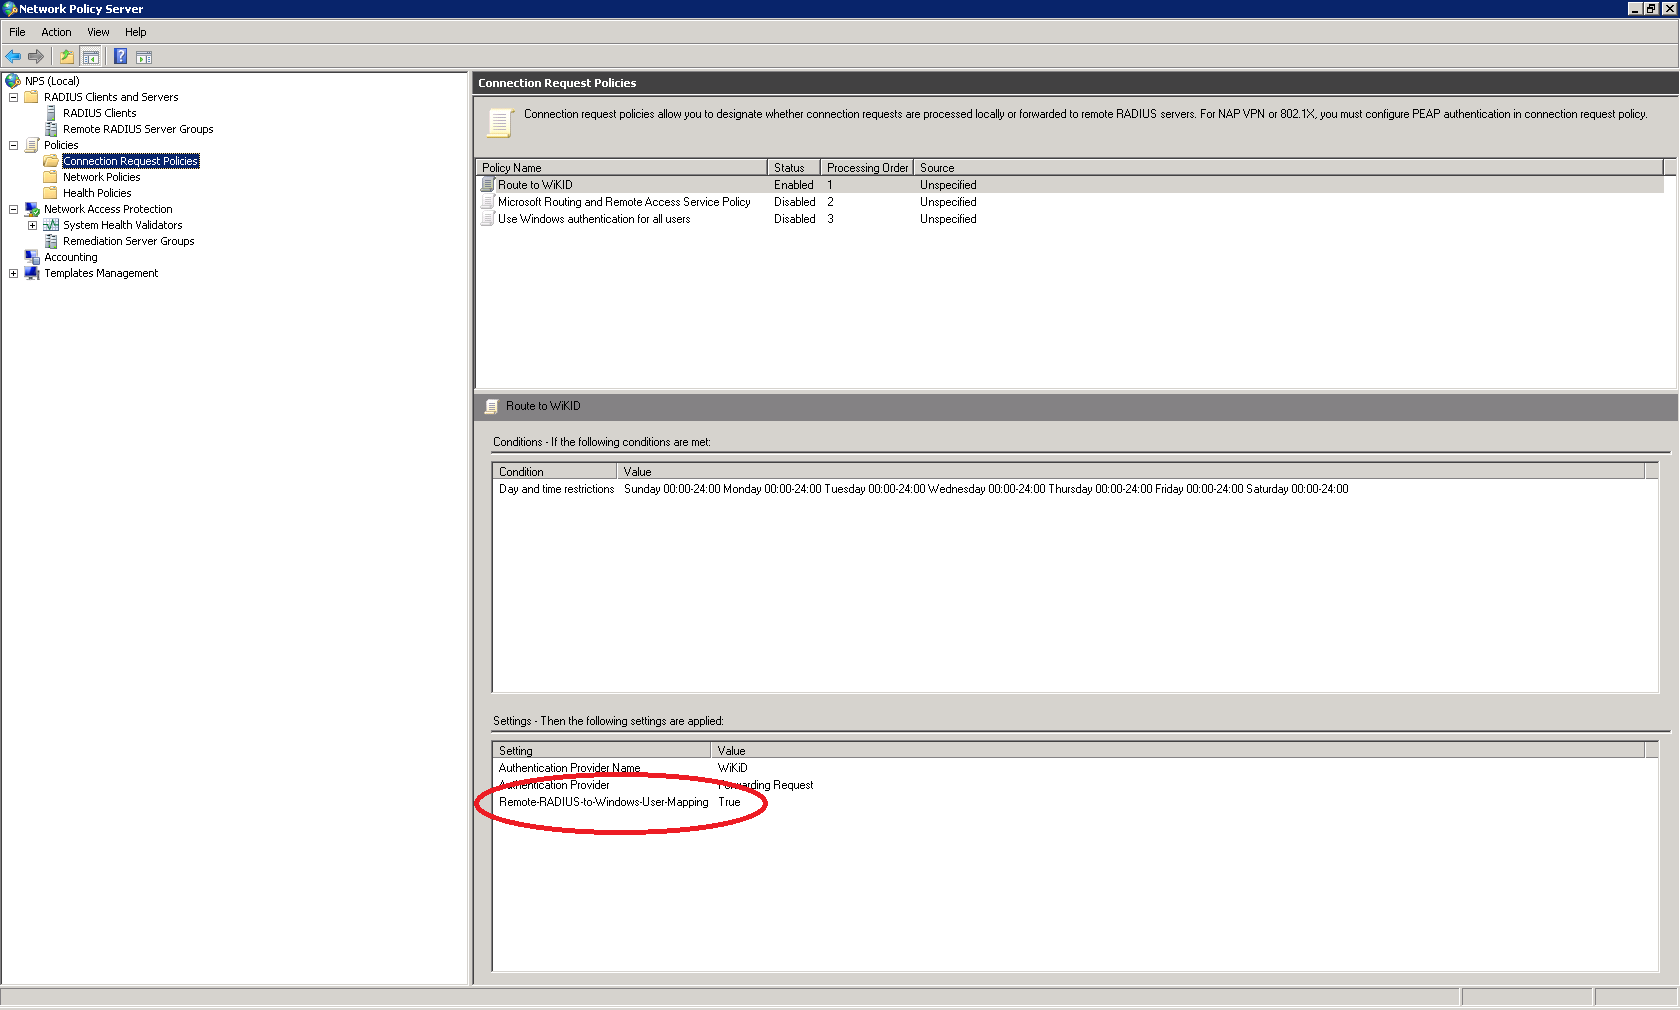
Customers have mentioned having issues with getting the NPS Radius Connection Request Policy working. One sent us this screen shot of a working connection request policy. They set up the Remote-RADIUS-to-Windows-User-Mapping to True:
Remember, at WiKID we believe that pre-sales engineering is better than post-sales support, so download a free trial of the WiKID Enterprise Server and get it working in your network.
Did this post help you? If so, please share it on Twitter!

