Adding two-factor authentication to your SonicWall VPN appliance is a three step process: create a RADIUS domain on the SonicWall, create a User Group and add the SonicWall as a network client on the WiKID Strong Authentication Server.
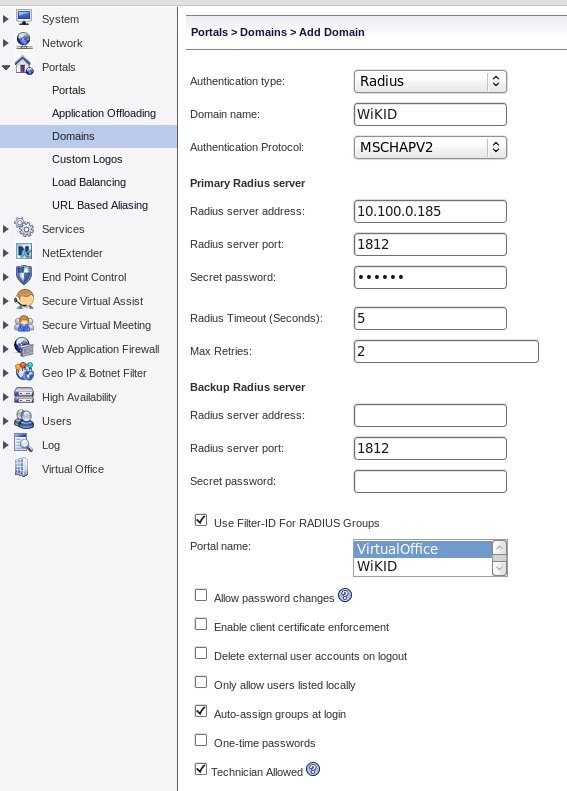
Log into the Admin interface and Click on Portals. Either select an existing portal to add two-factor authentication to or create a new portal. Next, select domains and Add Domain. For Authentication type choose RADIUS. Choose MSCHAPV2 as the protocol (but know that there are flaws in this encryption scheme so only use it on internal trusted networks). Enter the IP address of the WiKID server as the Primary Radius server address and a shared secret. Leave the port as 1812. Leave the Backup radius server blank. Check the box for Use Filter-ID For RADIUS Groups and choose the Portal. Finally, check the box for Auto-assign groups at login.

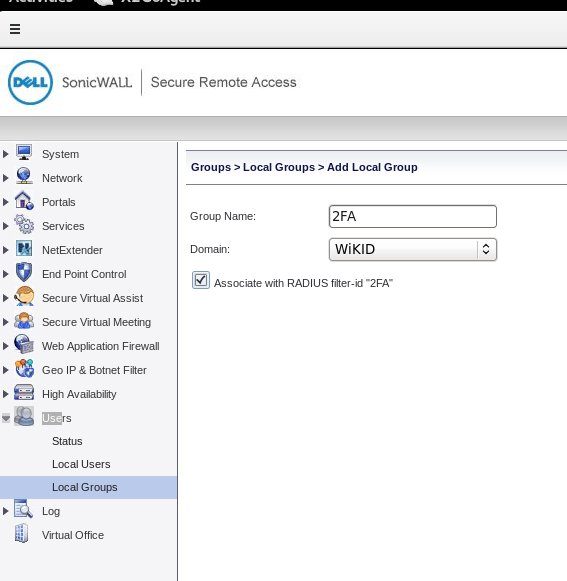
Next, click on Users, Local Groups. Click Add Group. Give is a name, such as 2FA, and associate with the RADIUS Domain you created. Check the box Associate with RADIUS filter-id "2FA" and click Accept.

That should be it on the SonicWall. Now we need to add the SonicWall to the WiKID server as a network client and send it the Group name as a RADIUS-attribute.
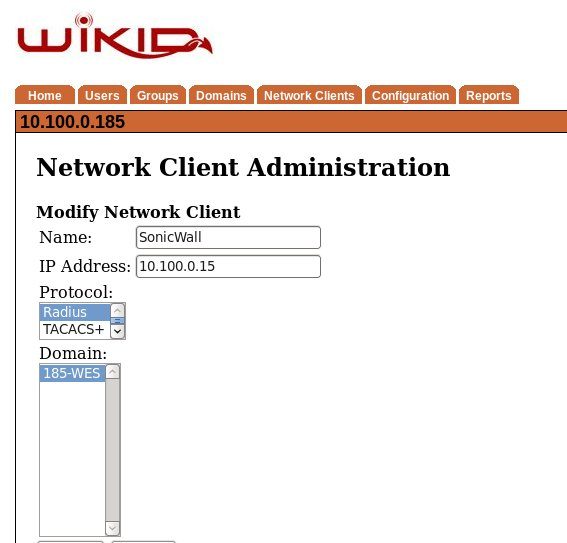
Login to the WiKIDAdmin web interface interface and click on the Network Clients tab. Click Create a New Network Client. Give it a name, such as SonicWall and enter the IP address. Choose Radius as the protocol and select a WiKID domain to use.

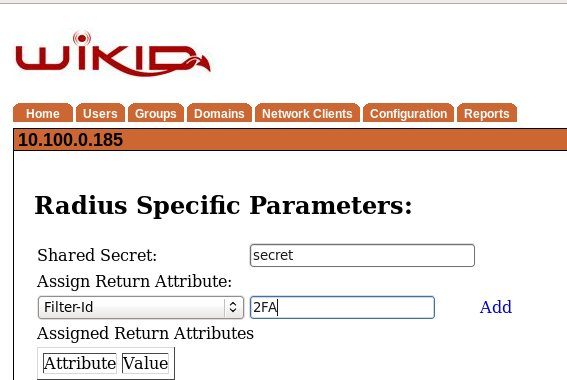
On the next screen, enter the same shared secret you created on the SonicWall. Select Filter-Id under the Assign Return Attribute and enter the group name you used, in our example 2FA. Click Create.

Restart the WiKID service to load the new Radius settings. You should now be able to login to that SonicWall portal using your WiKID username and OTP. Note that this setup is direct between the SonicWall and the WiKID server for two-factor authentication, but you can also put NPS or Freeradius in the middle and do authorization in your directory.
